How to Troubleshoot a Custom Solicited Protocol in OmniServer
Detailed Protocol Troubleshooting How-to
You've been given a protocol document by the manufacturer which you have used to create an OmniServer protocol. What now? The following how-to shows the steps to connect to your device and fine tune your new OmniServer protocol.
Details on gathering the required information from the example documentation used in this demonstration is available in  .
.
Details on creating your OmniServer protocol using the information from the example documentation used in this example is available in  .
.
If you'd like a PDF guide of all details from start to finish, click here.
What are the steps involved?
To begin, we need to connect to our device and try to communicate using the following steps. It is assumed that you have a client program available or will be using the OPC DA Test Client that installs with OmniServer.
In this example, we will use an OPC DA test client which installs with OmniServer that connects to OmniServer’s OPC DA ProgID “SWToolbox.OmniServer” with an OPC item name in the format “Topic.Item”. For your client application, check with its manual for details on how to connect to an OPC UA, OPC DA, Wonderware SuiteLink or DDE server. (For application notes on connecting to OmniServer with various clients,  .)
.)
Step 1: Create a New Device in OmniServer
A Device in OmniServer represents the physical connection to your actual device in the field. For the Meklar device in our example, we use a Serial/USB Mapped device type, where we specify the COM parameters as determined in the device documentation such as Baud Rate, Parity and Stop Bits. This device type is also compatible with USB devices having a software driver component that maps them to a virtual COM port.
Select the Devices section from the Configuration folder in the tree on the left in OmniServer. Then select File | New | Serial / USB Mapped Device from the OmniServer menu, if you need to create a new device.
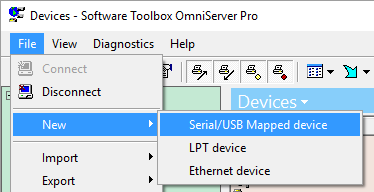
In this example, we will modify the existing COM1 device. To do that, select COM1 from the tree on the left under Devices and modify the COM parameters to match what was specified in our device documentation.
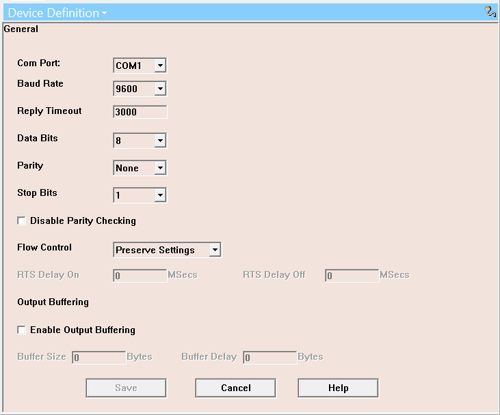
It is very important that your communications parameters are correct, as any errors here will result in problems later when we are trying to establish the connection to the device. Most device documentation will list the default COM parameters – while they could have been changed, the defaults are always a good place to start.
If you find later that you are getting COM errors in the OmniServer Logger, you may need to consult the device documentation to determine how to check the current COM settings on the device to see if they have been changed from the defaults.
Step 2: Create a New Topic in OmniServer
The Topic in OmniServer ties together the Device with the Protocol. It tells OmniServer to look a specified device and use the specified protocol when the client program requests data from that Topic.
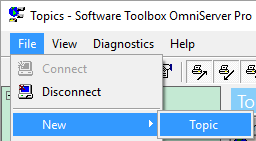
Select the Topics section from the Configuration folder in the tree on the left in OmniServer. Then select File | New | Topic from the OmniServer menu to create a new Topic.
Here we define the Topic Name (MeklarPLC), which will be used from the client application to access items define in the protocol. It is very important to assign the correct protocol (EBS_PLC) and device (COM1). OmniServer has to have this information in order to use the appropriate protocol and to make the correct physical connection to your device.
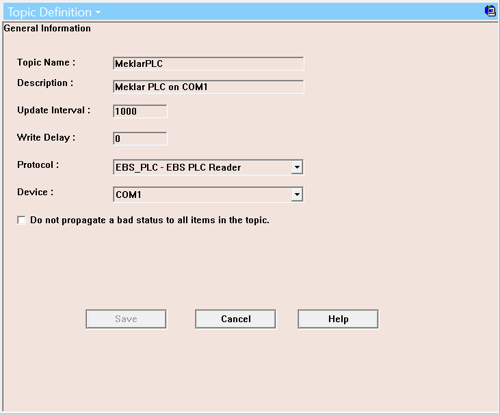
You will have a unique Topic created in OmniServer for each device you are communicating with. And this architecture is extremely efficient, as you can create only one protocol for each of the same make/model of device and re-use that protocol across any number of those devices (as opposed to having to configure the same protocol multiple times). For more details on the re-usability of protocols with OmniServer,  .
.
Step 3: Connect to OmniServer with Your Client
The next step is connecting to OmniServer from a client (HMI, SCADA, other). This is because OmniServer is a true “server” in that OmniServer will not make any requests without a “client” asking it to.
As I mentioned previously, we are connecting using the sample OPC DA test client that installs with OmniServer for this example.
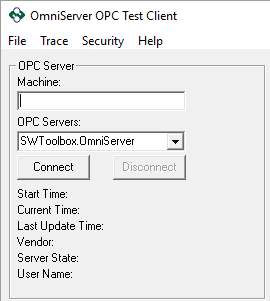
Launch the OPC Test Client from the Start Menu under Software Toolbox then click the “Connect” button to connect to OmniServer’s OPC ProgID “SWToolbox.OmniServer”, which is already selected by default.
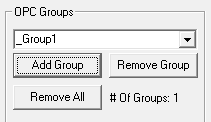
Once connected, click the “Add Group” button to add an OPC Group.
Next, in the “Namespace”, expand the hierarchy then expand the Topic (MeklarPLC) to find the Items defined in the OmniServer Protocol.
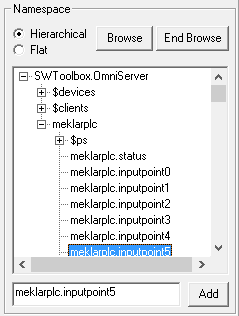
Select the desired item, for instance “meklarplc.inputpoint5”, and click the “Add” button to add the desired item to our monitored items.
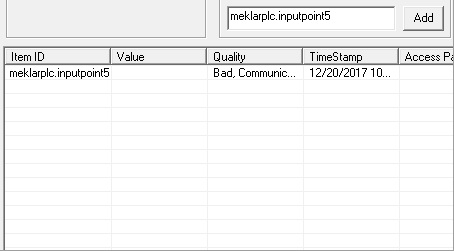
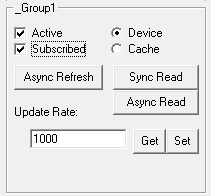
And last, but not least, make sure to check the “Subscribed” box to ensure an OPC subscription is made to the item, which will result in OmniServer sending requests to our device automatically at the frequency defined by the OPC Update Rate.
Step 4: How to Troubleshoot a Protocol
We’re now connected to OmniServer from a client and accessing at least one item that we’re interested in from the protocol we’ve created. Now we must cover the various steps necessary to determine any issues with your communication and address them. (For our easy-to-use OmniServer Troubleshooting Guide –  )
)
- Get Your OmniServer Ready - For the best troubleshooting, we will need to enable all the logging for OmniServer to ensure that sends and receives are being pushed to the OmniServer Logger. To do that, make sure these four buttons are pressed down on the OmniServer Toolbar:
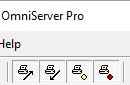
These buttons are View Sends (which records all data going out from OmniServer to the Logger Window), View Receives (which records all data coming into OmniServer to the Logger Window), View Events (which records all event data to the Logger Window), and View Errors (which records all errors to the Logger Window).
By default, only View Events and View Errors are enabled.
We will also be using the I/O Monitor in OmniServer for viewing sent and received data – however, logging this information to the Logger also provides timestamps, should it be necessary to analyze the timing between when a request was sent from OmniServer and how long it took the device to respond (which could require an increase to the “Reply Timeout” setting in your OmniServer Device properties).
- Determine if the Client is Connected – As I mentioned earlier, OmniServer will not talk with the device until a client program has established communications with it. So the first thing to check is if the client program is talking to OmniServer.
To do this, select Item Values from the Diagnostics menu and take a look at the MeklarPLC topic. If the topic is not listed, then the topic has not been created.
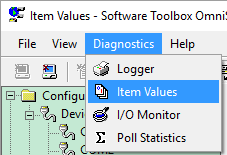
When everything is correctly configured, the item InputPoint5 will appear in the Item Values Window, which will confirm that the client application is talking to OmniServer, and that OmniServer will start doing its job.

If all you see is the item STATUS listed under the topic name, then check to make you’ve selected InputPoint5 in the client as shown previously.
If all this checks out at this point, then there is a spelling error or issue with how the item was defined in your client application.
- Determine if there is a hardware issue - Select the Logger window from Diagnostics in OmniServer. Check the logged entries for any errors that OmniServer may have received on the device. The errors themselves will be fairly obvious in indicating what the issue is.

Here are some examples of common errors you might find in the OmniServer Logger when there is a hardware issue:
- Serial Port: Error 5: Access Denied. This error means that another program has exclusive control of the COM port. Since OmniServer also needs control of that port and applications cannot share a COM port, this error is generated. You will need to determine what other application on the OmniServer machine is currently accessing the COM port and stop that connection.
- Serial Port: Error 2: Error opening COMx. This error means that, for some reason, Windows cannot see nor find the serial port. You will need to check that the port exists in Windows under the Device Manager and ensure that your device is actually connected to the correct COM port.
- Winsock Port: Error 10061: Connection Refused. (For Ethernet connections only) The remote device exists, OmniServer has been given the correct IP address and port number, but the remote device refused Window's request for a connection. Check the remote device and make sure that it will accept connections from the computer on which OmniServer is located.
- Determine if OmniServer is sending out data - Now that we know there are no hardware errors, we can be confident that OmniServer has opened up the port. So the next step is to find out if OmniServer is sending out data on the connection using the I/O Monitor. (We’re looking for black data streams in I/O Monitor, which indicates Sent bytes.)
Open the I/O Monitor by selecting I/O Monitor from the Diagnostics menu.
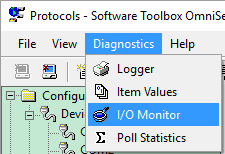
Then select the device (in our case COM1) from the dropdown. You should begin seeing, at a minimum, a line of color-coded black bytes which represent data being sent to your device from OmniServer.

If you do not see any sends in the I/O Monitor, go back through the previous steps and confirm that the client is connected.
- If you do not see any Green, Blue or Magenta lines of data, which represent data sent back to OmniServer from the device, then the device is not responding to OmniServer. There are two possible problems:
- The device is encountering a hardware error. Any problem like this will be reported (hopefully) by any diagnostic information on the device itself. Troubleshooting this is dependent upon the device and not OmniServer.
- The data stream coming in from OmniServer is not correct. Check the black Sent lines in the I/O Monitor and compare them to what the device expects. If they do not match, then you will need to change the Request portion of the Command/Response message in OmniServer to reflect what the device expects.
- Determine if the device is responding to OmniServer – As touched upon in the previous step, now we need to determine that the device is accepting data from OmniServer and responding appropriately, also using the I/O Monitor. (We’re looking for non-black data streams to indicate received data – Green, Blue, Magenta and/or Red.)
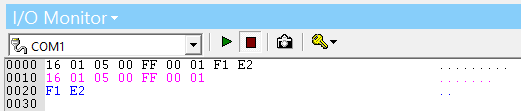
If you have blue and/or magenta data in the I/O Monitor, that indicates data has come in from your device but doesn’t match any of the configure responses in your OmniServer protocol.
The good thing is that you now know exactly what the device is sending back byte-for-byte so you can compare what you are receiving to your Response message in the OmniServer. You’re looking for what’s different – OmniServer is a pattern matching engine, for all intents and purposes. Find what’s different, change your protocol message to match, and all should be good.
- So You Are Receiving Data – But is it Correct? – If you have any colors in your I/O Monitor other than Black and Green, this indicates an issue with the formatting of your Command/Response message in the OmniServer Protocol.
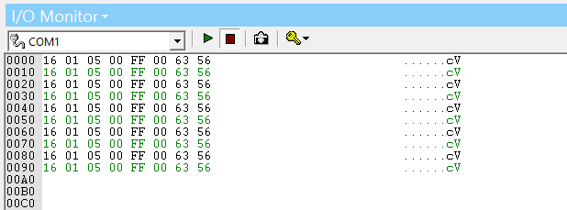
Green data is what you want – this means the data has been received and has been correctly matched to a message in your protocol. All data has been interpreted and sent to the items requested by the client application.
- Received Data is Green in I/O Monitor but Item Values Isn’t Displaying Correctly - It's always possible that your data is coming in correctly, but the data does not match what you want.
For example, with our sample protocol, we could get the number 256 when we are expecting the number 1. Given that, we will know that the data bytes are reversed from what we expect (in this case, the Least Significant Byte (LSB) is being reported first instead of the Most Significant Byte (MSB)). To fix this, we would need to change the protocol to accept two-byte Integers as LSB first, then MSB.
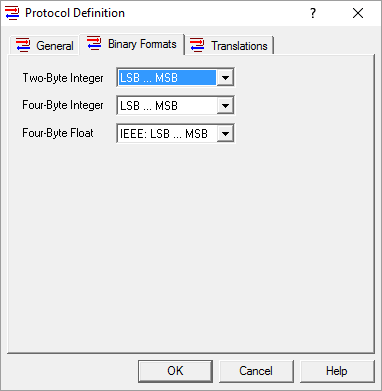
If your data is being received, but interpreted incorrectly, this means that you will need to check your item assignments in the OmniServer protocol and make sure that they are correct or that the data is in the correct format - like reading a four-byte integer instead of a four-byte real/float.
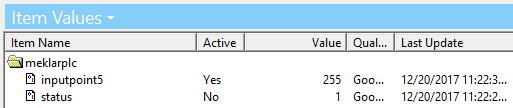
- Item Values Showing Correct Value but My Client is Not - This is definitely a problem with the setup of the client in how it is reporting or formatting the data. You will need to check the client to insure the data is being reported correctly. Check for things like the data type, any scaling that might be applied, etc.
Troubleshooting an OmniServer protocol is pretty straightforward once you are aware of the progression of steps. For further assistance in using the troubleshooting tools available in OmniServer, you can watch the  which covers both advanced protocol features and using the troubleshooting tools we’ve just discussed.
Ready to try it for yourself?